I tasted the carrot pickles and I like them. The rosemary adds an interesting flavor that was not exactly what I was expecting. The other ones I had made that were just refrigerator pickles had regular pickling spices and red pepper flakes in them. It was actually hotter than this one with the whole pepper in it. I guess that would depend on what kind of pepper you use. There is not a lot of choice on peppers in the middle of February, so I used what I could get.
But, that is not what I came to talk to you about. I’m here to talk about cheese. You can make your own, you know; from local milk that is taken from cows who can walk around in a pasture all day and who are not given regimens of drugs to keep them somewhat healthy. The milk I get comes from Johnston Family Farm near Newborn, GA. It is only about 20 minutes away from where I live. They sell their milk at Whole Foods in Atlanta, and also through the Locally Grown market based in Conyers. But the funnest way to get it is to go to the farm and pick out what you want from the refrigerator on the porch of the barn. Then you drop your money in a box nailed to the wall. All the cats come to meet you and watch as you choose what you want. Someone must give them milk, but I don’t want to share any of mine with them. You can check out their website, http://www.johnstonfamilyfarm.com/. The milk is delicious, low-heat pasteurized and not homogenized. They have all varieties, whole, skim, 2%; they even have chocolate milk and cream. A few weeks ago, I invited a couple of friends from work to come and make cheese with me. We made basic fresh mozzarella, which is quite easy and only takes about 45 minutes to an hour.
Brenda and Gabrielle were amazed at how easy it was to do, and wondered, like I did, at why people ever stopped doing this at home. It is so much better than what you get from the store. But I guess it is like everything else, it just seemed more convenient. I remember all those supposed time-saving commercials when I was a kid. After being brainwashed about that for so long, you just give in. But by doing that, you lose a lot of the satisfaction of creating your own life, not depending on someone else to do it for you at a cost. But I digress again; we really should get on to the making of the cheese.
In order to make cheese, you must have milk, any kind will work, whole, 2% or skim. The milk you use cannot be ultra-pasteurized; so that rules out most grocery store organic milks. To make it turn into cheese you need citric acid, lipase, rennet and salt. The recipe I use comes from the Animal, Vegetable, Miracle website, http://www.animalvegetablemiracle.com/Mozzarella.pdf. You can get all your cheesemaking supplies from New England Cheesemaking Supply Company. Their web address is www.cheesemaking.com.
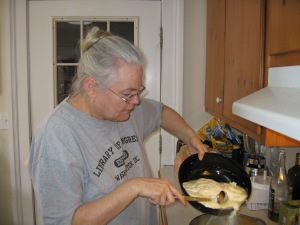
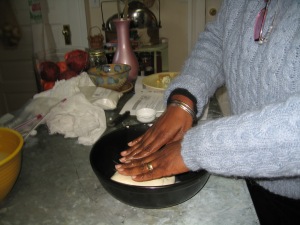
But I don’t exactly make it like the recipe. The method is the same but I add lipase to the mix, just before putting in the rennet. Lipase is an enzyme and I think it gives the cheese a better flavor. You can get it from the cheesemaking folks along with everything else that you need. You must keep it and the rennet tablets in the freezer to keep them fresh. You only have to heat the milk up to 100 degrees to make this cheese. That is one reason it does not take so long. At 50 degrees you add the citric acid; at 90 degrees you add the lipase and then the rennet and stir gently. Stop stirring as soon as the milk begins to separate. Increase the temperature to 100 and then turn off the heat. Let it stand for 5 to 10 minutes to separate completely; then dip out the curds into a large microwaveable bowl. They will be full of whey, so you must begin kneading them. As you do the liquid will come out and you pour it back into the pot. This is harder than it sounds. You have to hold onto the curd and pour around it. Once you have gotten as much out as possible, heat the cheese in the microwave for about 45 seconds and knead some more. The whey will be more creamy looking.
Now heat it again and knead some more. Heat it at least one more time and knead and stretch. After the third time that you heat it, knead the salt in. The recipe calls for 1 1/2 teaspoons, but I only use 1 teaspoon. You may have to heat it more. It should be pretty hot now, and pretty stretchy. The strands should not break, but stretch out. That is how you know it is ready. Once it stretches without breaking, you can break it off into small balls and drop them in ice water or form it into one large ball. I have a bowl that is just the right size and I just put it in there with plastic wrap over the top. I know, I know, I hate plastic wrap, but the surface gets a really funky texture if it stays exposed to the air. I guess you could put the one large ball in a deep bowl of ice water. Keep the cheese covered with water or plastic wrap in the refrigerator and eat it within a couple of days.
Chop it up in salads; make pizza or lasagna; cheese toast is good. Whatever you do with your mozzarella, you’ll have the satisfaction of knowing exactly what went into it and who made it. Enjoy!


